Setup a SmartHandler
Analytics
On this Page:
About this Tutorial
In this tutorial, you will learn how to setup an example SmartHandler. For this scenario, an employee wants to "monitor a catch-all inbox and automatically create new Jira tickets in different projects depending on the email recipient." However, if the email subject line contains an existing Jira Issue-Key, they want to update the existing ticket by adding a comment containing the email body, instead of creating a new ticket. NOTE: As you walk through this tutorial, the screenshots contain settings and text you need to type in to set this up. You can use your own email to test running and pausing the SmartHandler when you finish. Let's get started!
1 | Create a New SmartHandler
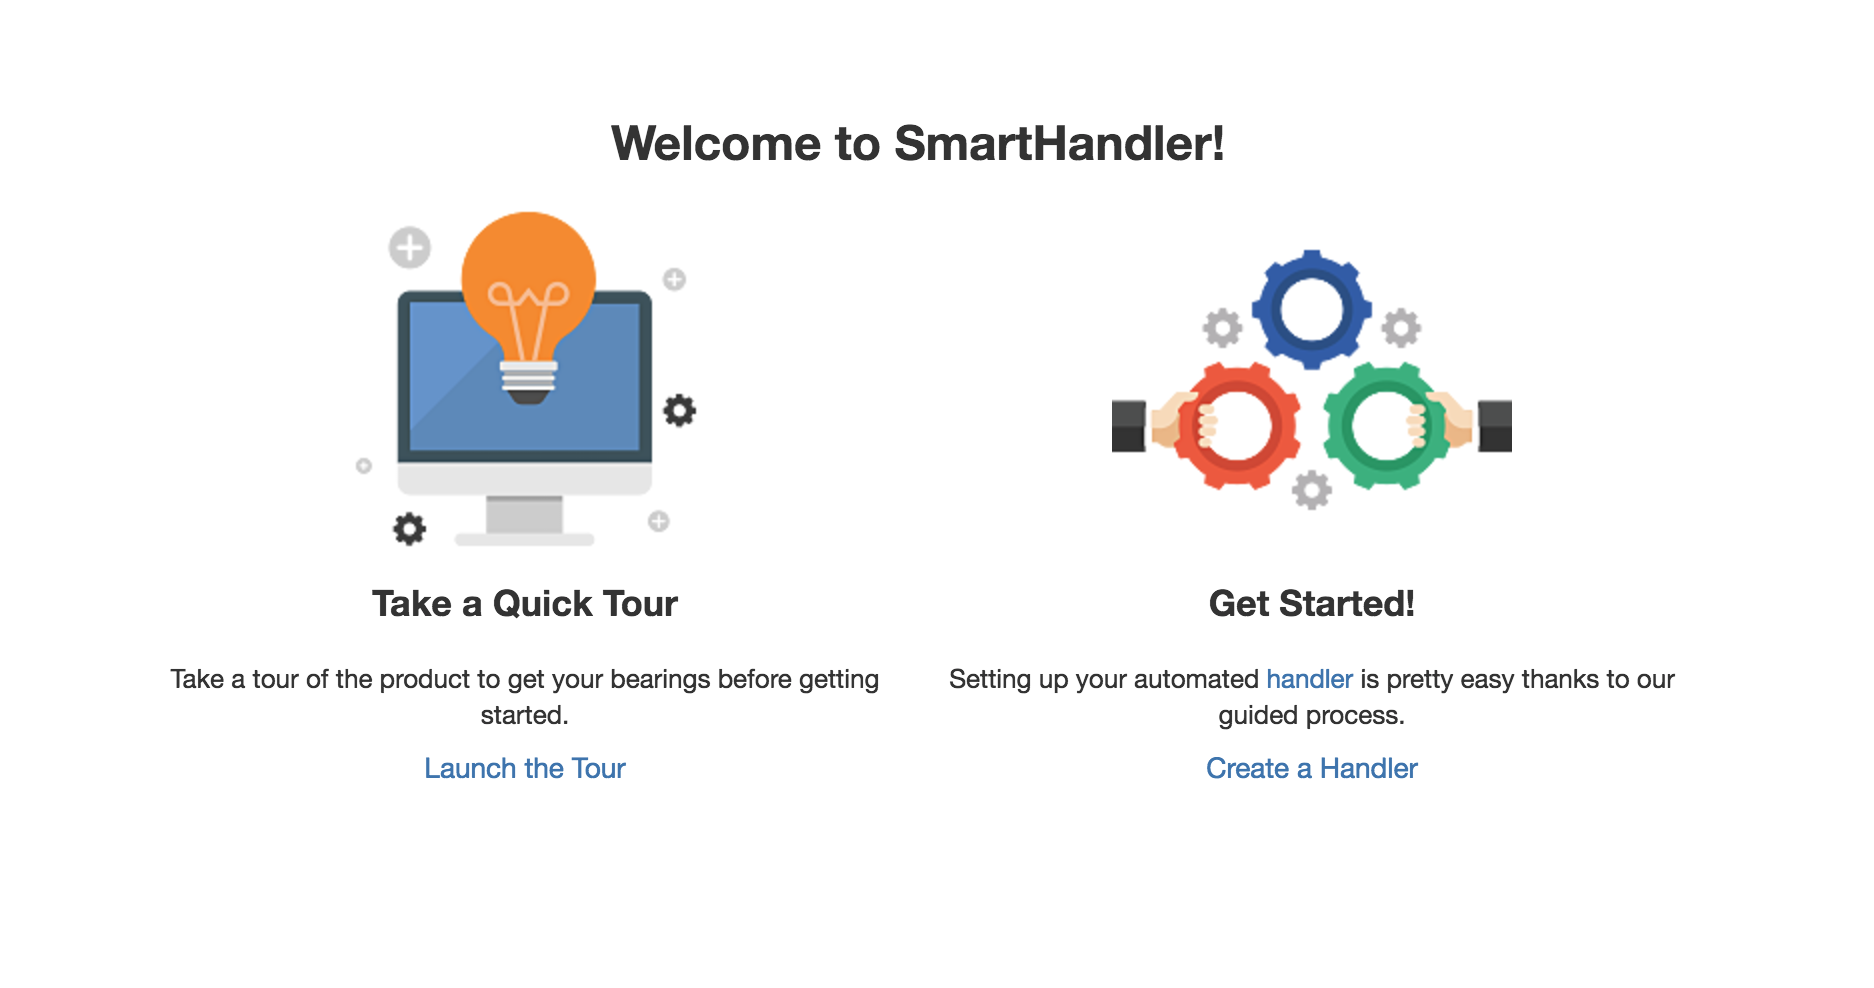
Upon opening a fresh install of SmartHandler For Mail, you will be presented with this splash screen. Select Create a Handler if you are starting from scratch. At the end of this tutorial you will find a JSON example of the handler we create. Download that file and paste the contents into the import handler dialog. The import handler button can be found in the top right corner of your SmartHandler home page.
=
2 | Select the Parser Type and Email Server
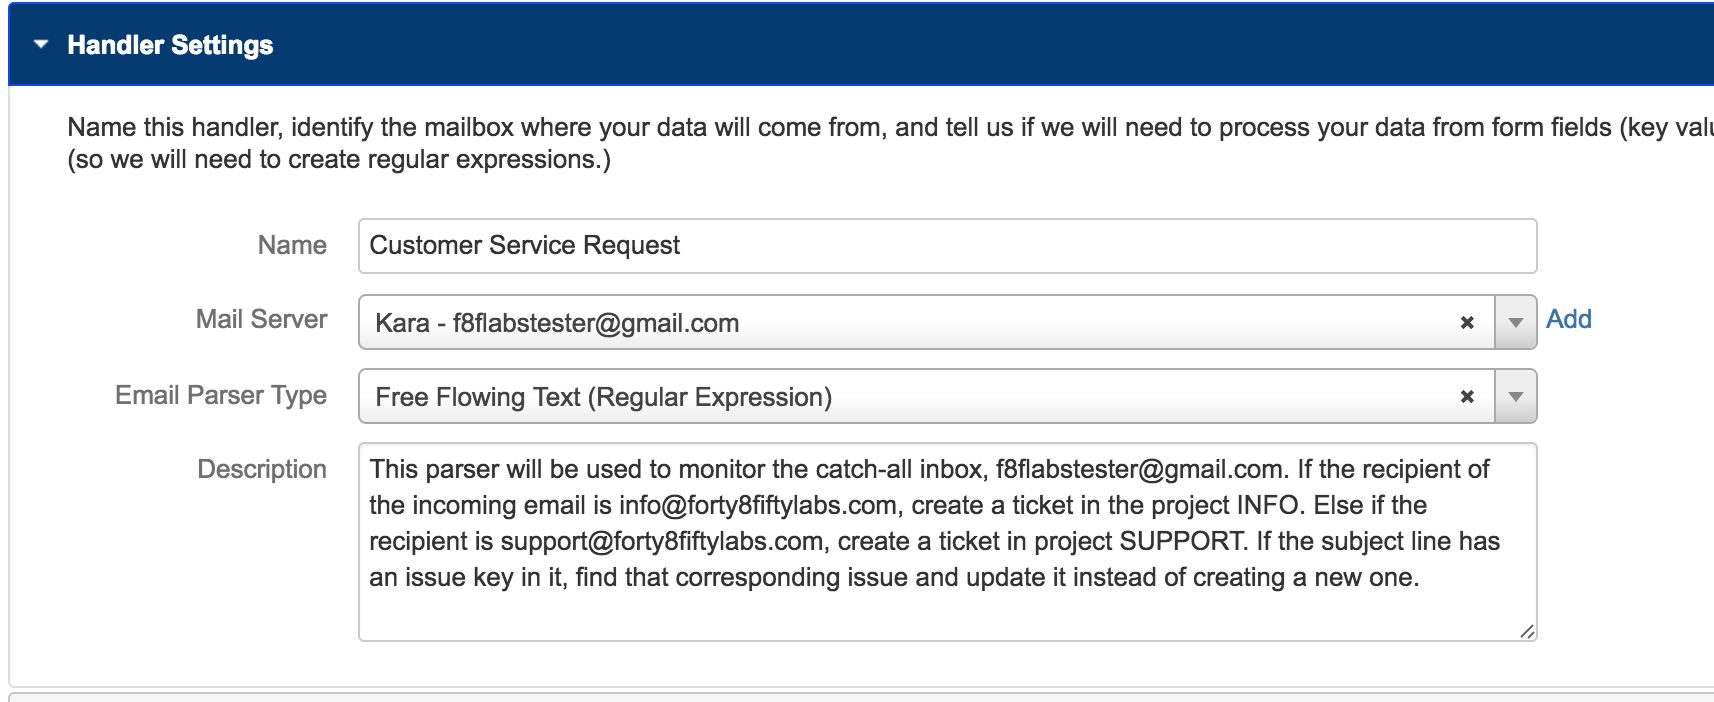
In the first section of SmartHandler creation, you will need a few pieces of key data. First, give your SmartHandler a unique and descriptive name. Next, you will need to know which mail server you want to use. If the inbox you are looking for isn't in the drop down list, click Add. This will open a new tab and direct you to the Incoming Mail section of Jira system settings. You will be able to add you mail server here.
Selecting your parser type is dependent on the incoming email's format. SmartHandler can handle key-value pairs, common in web forms, or free-flowing text. An email that uses free-flowing text will require some knowledge of regex to set this up. We provide some basic templates for regexes, but for additional information check out this website.
Because our email is a free flowing text, we will use Free Flowing Text (RegEx) Email Parser Type in this example.
Gotchas:
- Selecting which email protocol you want to use may not be obvious at first glance. Consider your use case and what functionality you would like to happen in the inbox after an email has been handled. If you want your inbox to remain unchanged, select POP. However if you want your email to be marked read and archived after it is handled, select IMAP. Note that if there is an error processing the email, in addition to error handling defined by user in upcoming steps, IMAP will mark an email read but it will remain in the inbox. This is an indication that something went wrong.
- If your incoming email is half key-value pair and half free-flowing, you will need to use the Free Flowing Text (RegEx) parser type and enter all values as regular expressions.
=
3 | Define Email Match Criteria
Email Match Criteria is a set of conditions that must be met in order for a SmartHandler to continue processing the email. Because multiple SmartHandlers can monitor the same inbox, this set of criteria must be unique to this handler. In our example, we only want to handle emails that are sent to either support@forty8fiftylabs.com or info@forty8fiftylabs.com.
Select Email to and Contains, and enter your email or one that shows up in the system for ypu - ours would be "If Email To contains '@forty8fiftylabs.com'".

Depending on how your inbox is used, you may need to be very specific... or not. The first match criteria reads, "If Email To is equal to 'support@forty8fiftylabs.com' OR if Email To is equal to 'info@forty8fiftylabs.com'". This is the route to go if your inbox will also catch other emails like "SecTeam@forty8fiftylabs.com".

=
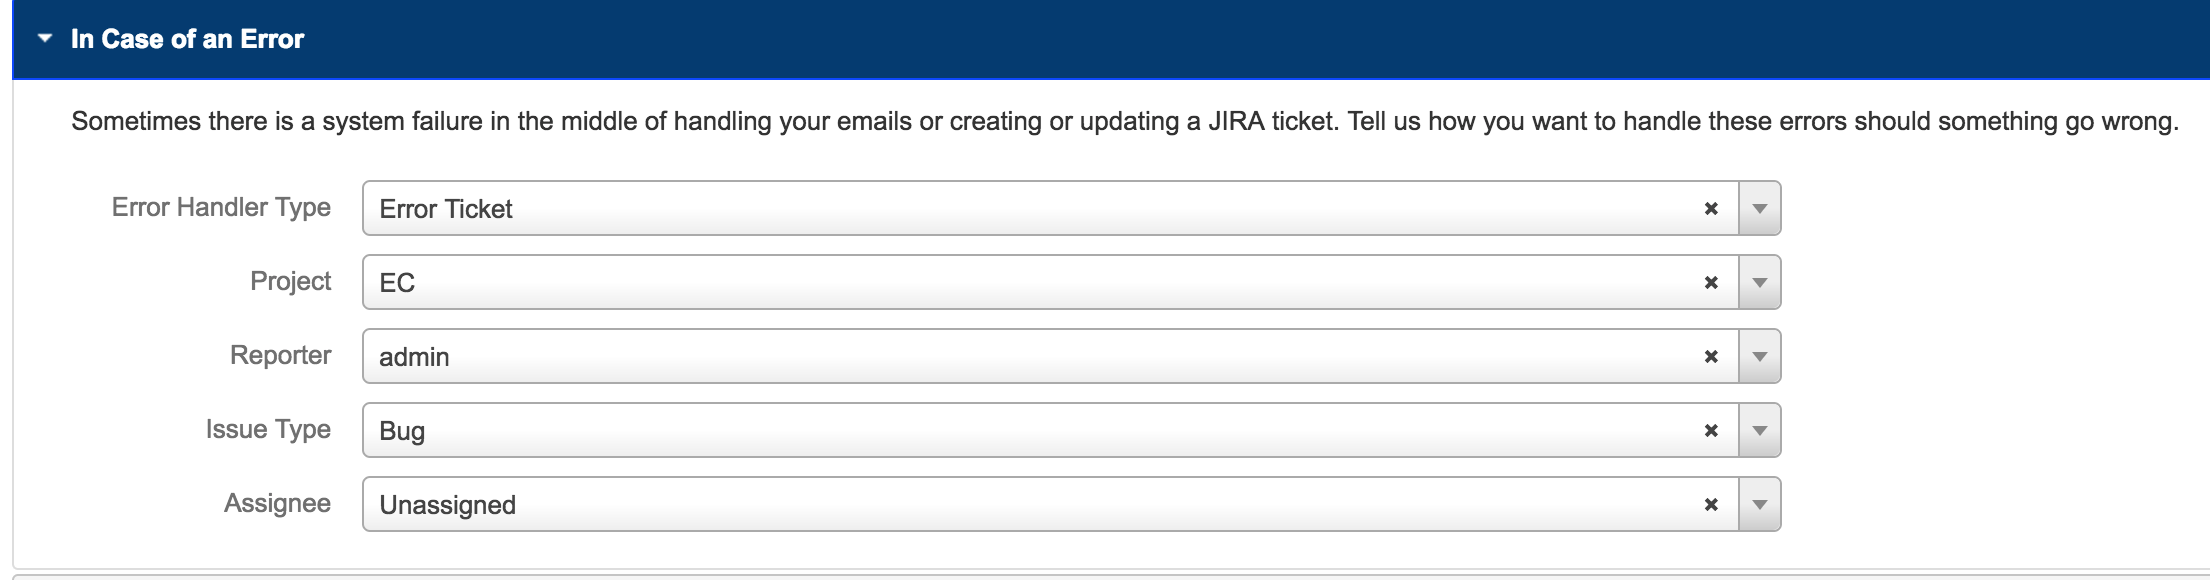
4 | Setup Error Handling
This section allows the user to define how they want to handle errors. The first option is to forward the email and error message to a specified email address. The second option, and the option this tutorial will use, is to create ticket with the information specified placing the email and the error message in the description field.
=
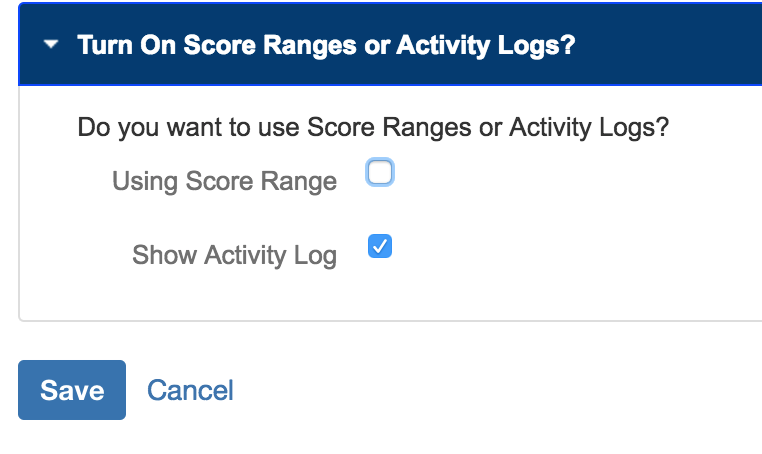
5 | Toggle Scoring and Activity Logging Off or On
The last section in creating a handler is to toggle Score Ranges and Activity Log. Activity Log is very useful when first setting up a handler. It will show you emails that were process and link to created tickets. This is great for initial debugging and troubleshooting. Long term, we recommend disabling this feature and clearing the log. The logs will be stored on your Jira instance's internal database, so it is best to keep these cleared. Score ranges will not but used in this tutorial, but you can learn more about them here.
This concludes the creation of your first SmartHandler. Now save it!
=
In the app, you are ready for the next section.
Go to Data Points
=
NEXT STEP: DEFINE DATA POINTS