Define Data Points
Analytics
On this Page:
About this Tutorial
In this portion, you will define and create the required Data Points and their regular expressions for our incoming email. We will only need 2 Data Points for our scenario.
=
1 | Add Your First Data Point
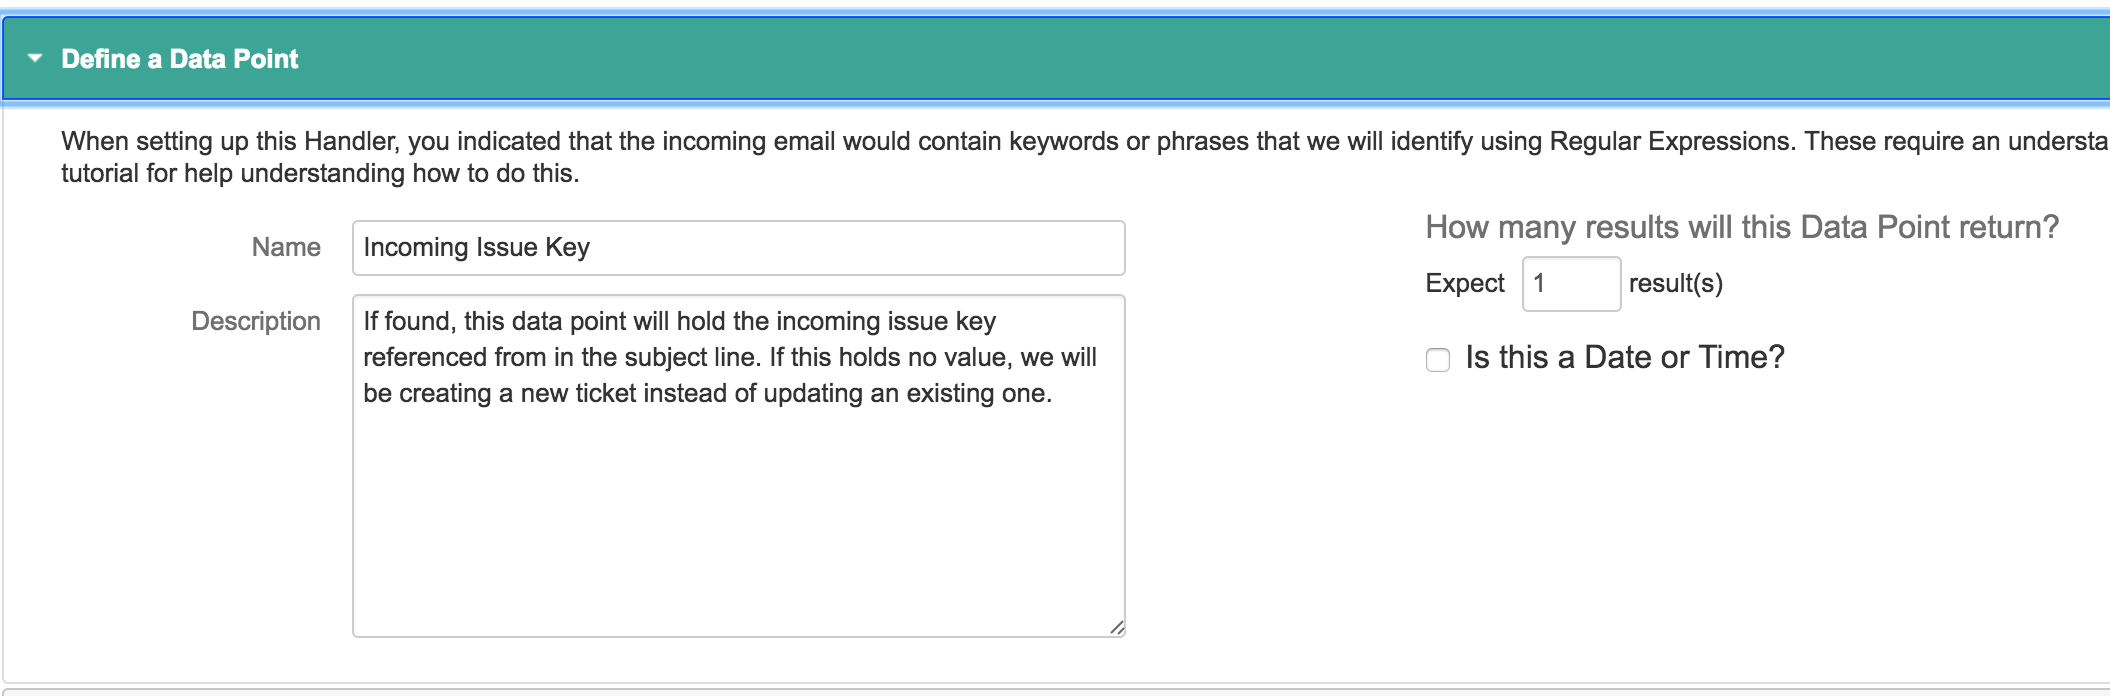
Selecting the Data Points tab in the left menu will bring you to the Define a Data Point screen. First, you will need to give your Data Point a unique and descriptive name. Name this one Incoming Issue Key. Optionally, you can add a description for each Data Point.
Then you will be asked two questions relating to this Data Point. The first question is how many results you expect your RegEx (defined in the next step) to return. The minimum number expected is 1. If your RegEx finds no value, that is ok. Your Data Point will consequently be equal to Empty or Null (this will become important when we create our Actions). To see an example of a Data Point returning more than one value and how to use that in an expression, click here.
The second question asks if this data point will hold a date or time value. This is important because in order to parse this information into a Jira Date Picker field, we must know the incoming date format. We provide some basic templates to select from, but you may need to create your own. If you need more options, use the Java Date Formats.
=
2 | Select First Regex Template
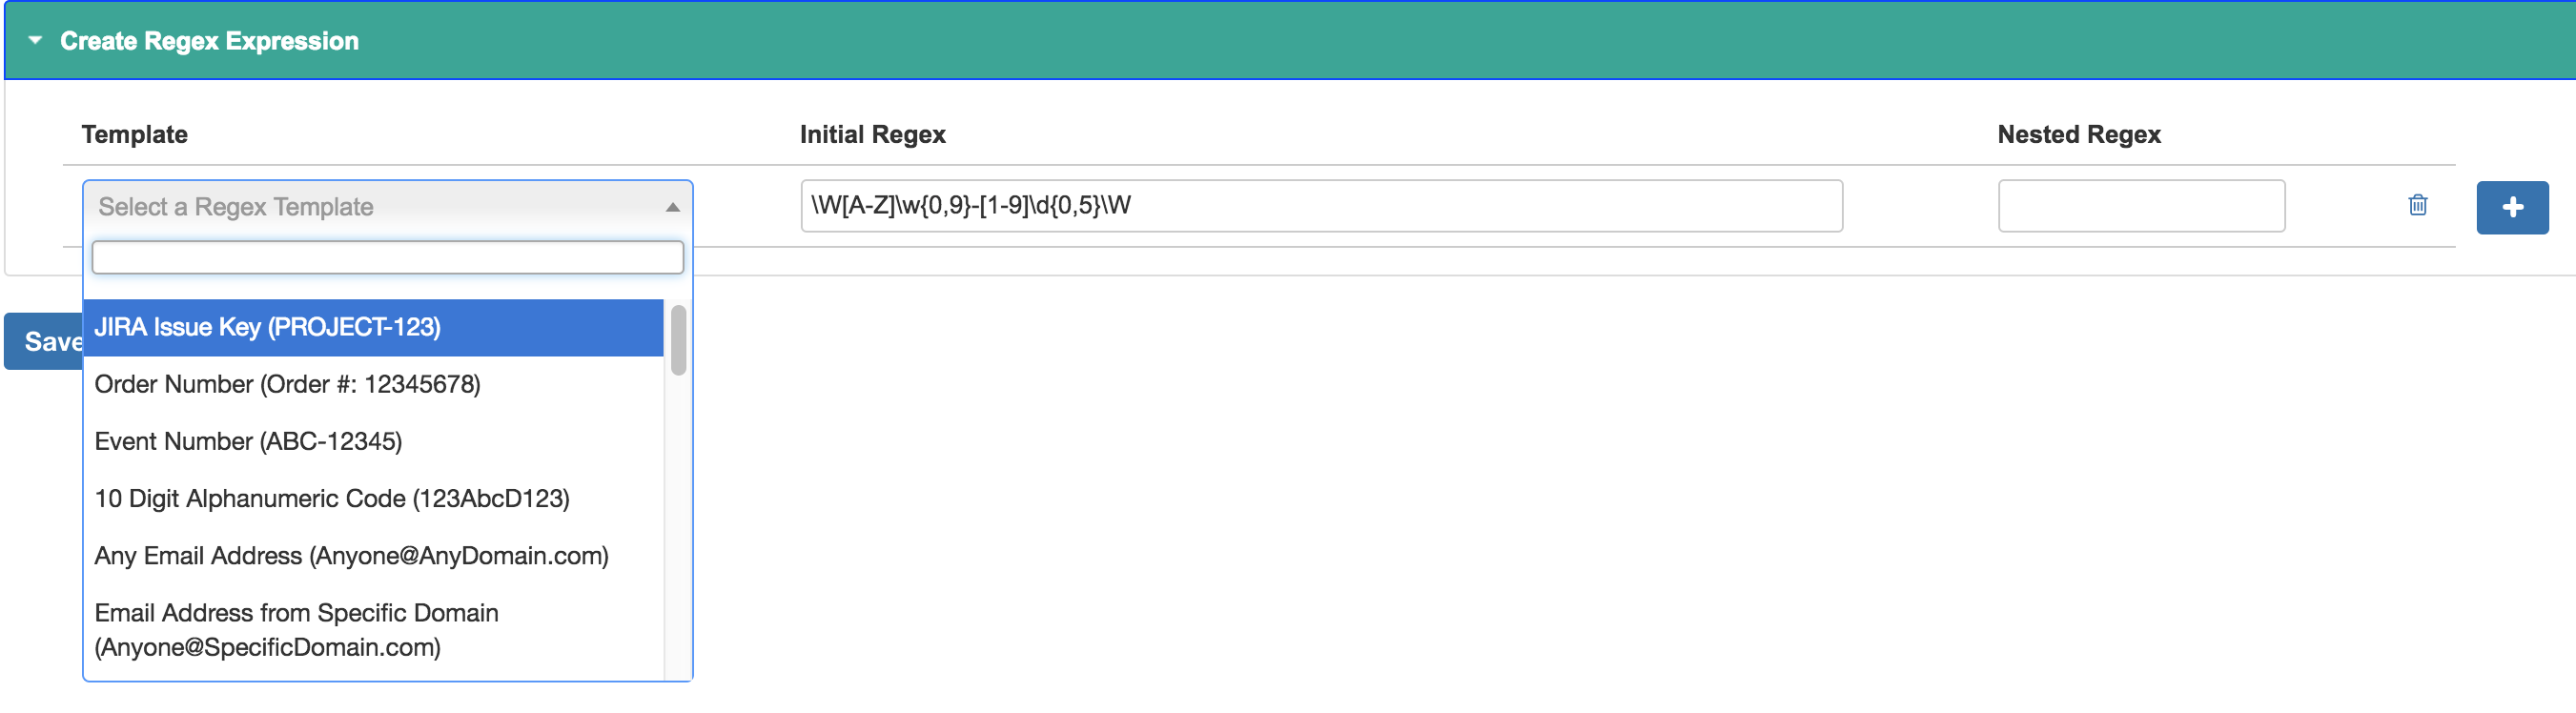
When using Free Flowing Text (RegEx) as your email parser type, the SmartHandler will require a RegEx for each Data Point. This is how we are going to locate the text in your emails to know what to do to process them. You may select and edit any example template provided, or write your own regular expressions.
For this Data Point, you will not need to edit the template. Select the Jira Issue Key template. (Leave the Nested Regex box blank for now. Click the Save button to save this Data Point - this will take you to the Data Points List screen.
=
3 | Add Second Data Point
Under the Data Point list, click the New Data Point button to return to the Define a Data Point screen. Name this one Recipient.

=
4 | Select and Edit Second Regex Template
This time the Data Point RegEx requires something not in one of the templates. Our goal is to pull out the username from the email address in the email to section of the incoming email. For example, if Email To is equal to info@forty8fiftylabs.com, Recipient will hold the value 'info'. To accomplish this, select Email Address from Specific Domain in the dropdown menu.

Then we will need to edit the template to match the (@forty8fiftylabs.com or your own) domain name. Because we only care about the portion of the email address before the @ sign, we use the Nested RegEx field to apply a second RegEx on values found by the initial one. The Nested RegEx field is used only if you need to narrow down your Data Point value even further than the initial RegEx will allow. You need to type in these exact strings, but use the domain name that matches what you selected in the settings for this SmartHandler.

Once completed, press the Save button. Now we are ready to put these Data Points to use! Let's go create some actions...
-
In the app, you are ready for the next section.
Go to Actions
=
PREVIOUS STEP: HANDLER SETUP
NEXT STEP: CREATE ACTION